
How to Start Doing Calligraphy in 6 Steps (with video tutorial)
Want to know exactly how to learn calligraphy and what supplies you need?
In this post I’ll show you the steps to take to start doing calligraphy TODAY, even if you don’t have good handwriting.
Once it’s all broken down step-by-step for you, you’ll realize calligraphy is not actually as complicated as you might have thought!
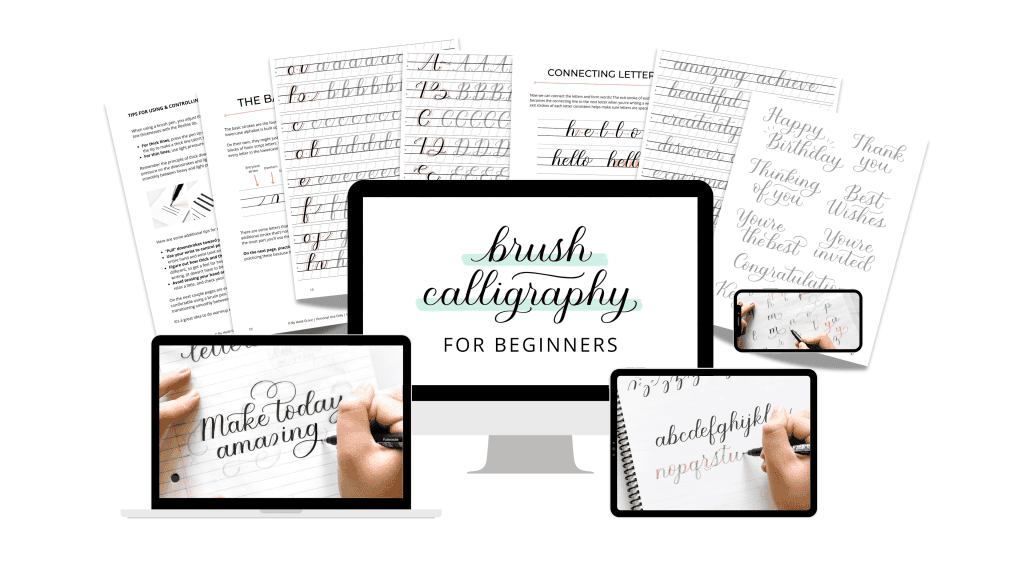
Learn how to do calligraphy in my online course!
I’ll make learning calligraphy easy with step by step videos and printable worksheets for you to trace.
But we’ll also go BEYOND the basics and discover the secrets to making your calligraphy look totally awesome!
I personally started learning calligraphy in 2017 and got hooked really quickly.
It’s a lot of fun, it’s not expensive to get started, and you’ll soon be impressing your friends and family with how beautifully you can write 😉
If you’d rather watch, I also made a video tutorial that shows you how to start ⬇️
You might also be interested in: How to Avoid These Common Calligraphy Beginner Mistakes
This post contains affiliate links. Learn more.
How to start learning calligraphy
This list gives you a quick overview of how to begin!
Here are the steps you need to take to start doing calligraphy with a brush pen.
- Get some supplies.
You’ll need a brush pen, smooth paper, and traceable calligraphy worksheets.
- Learn how to use a brush pen.
Next you need to learn how to use a brush pen correctly so you can use it to get both thick and thin lines.
- Practice the basic strokes.
The basic calligraphy strokes are the building blocks of lowercase letters. It’s important to master the eight basic strokes before you start writing letters.
- Put the basic strokes together to form lowercase letters.
Once you’ve gotten the basic strokes down really well, you can combine them to make letters.
- Connect letters and write words.
After you’ve learned the entire lowercase alphabet, you’ll connect the letters to write calligraphy words.
- Learn an uppercase alphabet.
When you’re ready, learn an uppercase alphabet. Uppercase letters are usually more stylized and aren’t necessarily made up of the basic strokes.
- Keep practicing.
Keep writing letters and words and practicing the strokes. You’ll get more and more comfortable with doing calligraphy and then you’ll go beyond the basics and start adding more style to it!
I’m going to go over these steps in more detail with you throughout this guide.

Get real-time, step by step video instruction in my online course
Skip the overwhelm and clutter of all the information out there! I’ll make it simple with step by step videos and worksheets so you can find joy and relaxation with this beautiful art form.

What is calligraphy?
Calligraphy isn’t just fancy cursive.
To do calligraphy, we write each letter piece by piece (instead of continuously like cursive) and use a flexible pen to do thick and thin strokes.
The goal of calligraphy is not to write quickly, but to write beautifully! That’s why it’s called “the art of beautiful writing.”
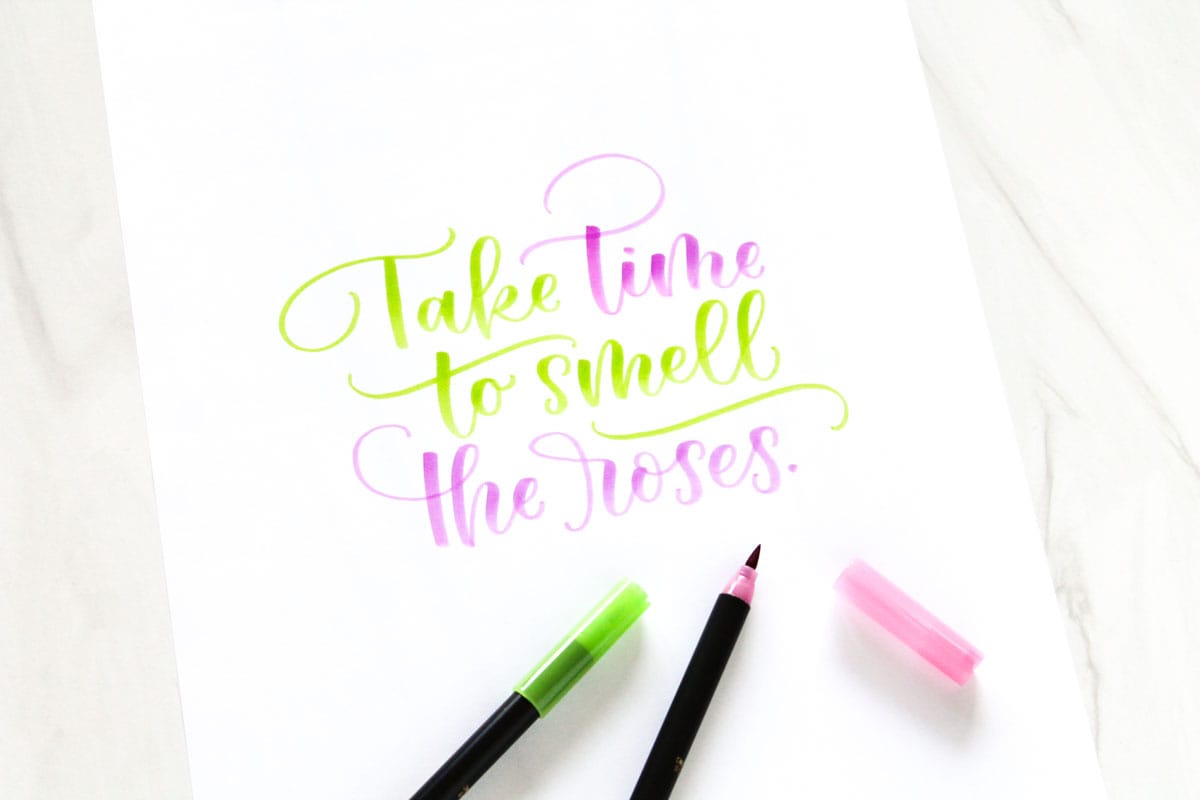
There are many different styles of calligraphy and different pens that are used, but in this post I’ll be talking about how to do modern brush calligraphy.
Modern brush calligraphy is a modern style of calligraphy using a flexible brush pen.
Sometimes it’s also called “brush lettering.”

Grab your printable calligraphy workbook
Start practicing now with this printable workbook that teaches you everything you need to know for a super solid start!
Guidelines
In calligraphy, we use guidelines to keep everything neat and show us where to end or begin strokes.
The top and bottom guidelines are called the ascender and descender lines.
Then two guidelines in the middle called the waistline and the baseline.
The letters will “sit” on the baseline.
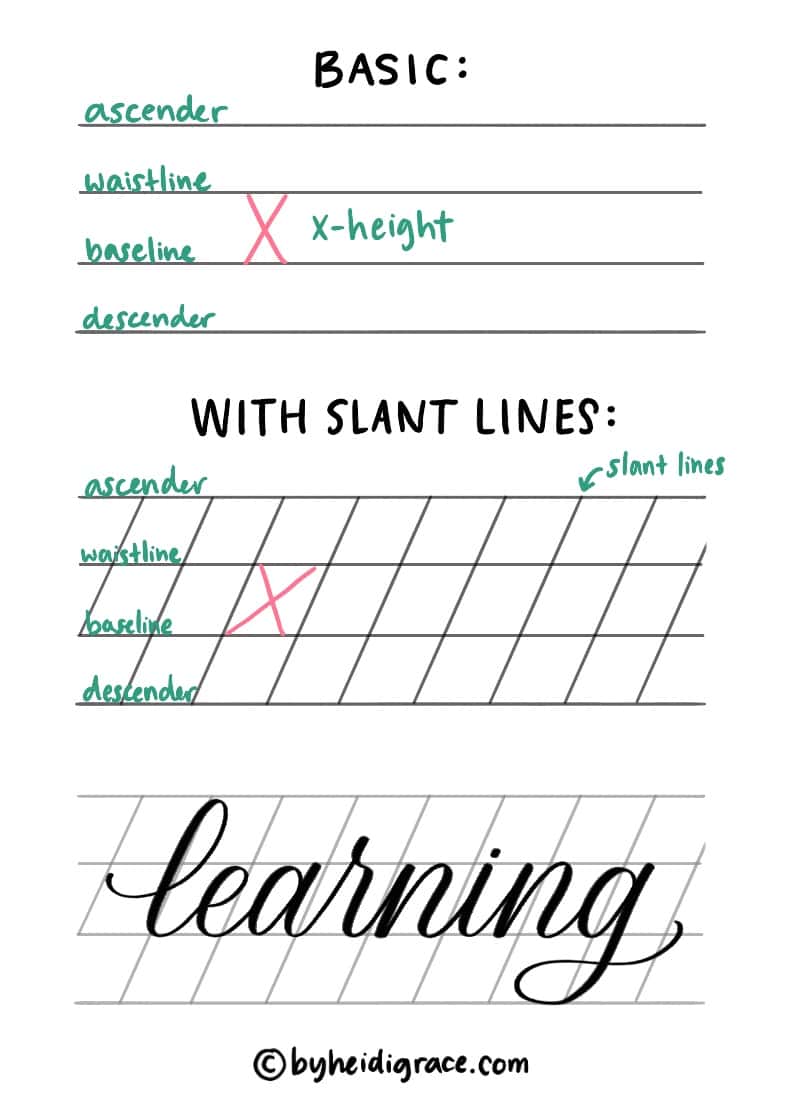
The area between the baseline and waistline is called the “x-height.”
Calligraphy guide sheets will already have the guidelines set up for you, so that makes it easy!
If you don’t have calligraphy guidelines, you can use lined or grid paper and just mark where the x-height and ascender/descender lines will be.
The 3 supplies you need to start
To start doing brush calligraphy, all you need are 3 things:
- Brush pen
- Paper
- Worksheets
Here are the specific supplies I recommend:
- Tombow Fudenosuke brush pens
- Smooth tracing paper
- or Canson marker paper
- Brush Calligraphy for Beginners workbook
Brush pens
Brush pens are pens that have flexible brush tips.
(Check out my full list of recommendations in this post: Best Brush Pens for Calligraphy Beginners)
Tombow Fudenosuke brush pens are my top choice.
These pens come in a pack of two, with a soft tip pen and a hard tip pen.
I would start with the hard tip because it’s firmer and easier to control.

If you want colorful pens, these also come in a colored set.
Don’t have brush pens yet? You can even start doing calligraphy with a pencil!
Paper
Pick a smooth paper that won’t fray your brush pens, like tracing paper or marker paper.
Why use transparent or semi-transparent paper? Because you can put it on top of worksheets and still see the guides underneath ✅

(For more about the best paper to use, read this post: Best Paper for Brush Pens: A Complete Guide)
Worksheets
The worksheets you pick are a big deal, because they determine how you learn and what kind of calligraphy you learn.
I created a workbook for you that has everything you need in one place – basic strokes, alphabet, practice words, everything.
Just purchase, download, and print!
Grab your printable calligraphy workbook
Start doing calligraphy now with this printable workbook that has traceable guides for all the fundamentals and much more!

This workbook is also INCLUDED in my online course, Modern Brush Calligraphy for Beginners, which has in-depth videos and personalized support.
You can also look for free worksheets if you’re not sure you want to spend money on this yet.
Digital calligraphy supplies
If you have an iPad and would rather work digitally, you can practice calligraphy on your iPad, too.
Here’s what I suggest using:
- Apple Pencil (make sure it’s compatible with your iPad)
- Procreate app for iPad
- Calligraphy Procreate brushes by MegBon (the “Jagged Edge” brush is my favorite)
- Brush Calligraphy for Beginners workbook
If you’re new to Procreate, here’s a YouTube video tutorial for beginners to give you an overview of the basics.
You can bring JPEG or PDF worksheets into Procreate by tapping “Photo” from the Gallery, or open a canvas and click “Add” inside the wrench symbol menu to add files that way.
I suggest keeping each worksheet on its own layer and working in a separate layer above it.
How to hold and use a brush pen
Before you start doing calligraphy, you need to make sure you’re using the brush pen correctly!
Flexible brush pens are pretty different from regular pens, so we have to use them differently, too.
Pen position
Make sure to hold a brush pen at about a 45 degree angle to the paper.
Like this:

You’ll also need to position the pen tip to the side of your writing.
So the pen tip should be pointing toward the side of your paper. Like this:

Don’t hold the pen below your writing, because you won’t be able to get very thick lines (and the thickness will end up in the wrong places).
Then you’ll want to figure out a pen grip that feels comfortable for you.
Find a pen grip that’s comfortable but also gives you good control of the pen. (Avoid holding the pen loosely.)
If you’re like me, you’ll have a “special” pen grip for doing brush calligraphy that’s different from how you usually hold a pen for writing.
Related read: How to Hold & Control a Brush Pen for Calligraphy
Using a brush pen for calligraphy
Next you need to learn how to adjust the pressure you put on the pen so you can get both thin lines and thick lines.
First, press lightly and use the tip of the pen to make thin strokes going up.

Then press hard and use the side of the brush tip to get thick lines going downward.
Notice how the brush tip flexes as you add pressure.

Don’t be afraid to press hard – brush pens are made to take the pressure!
In calligraphy, upstrokes are thin and downstrokes are thick.
This means that when your pen is moving in a downward direction, you do heavy pressure.
When your pen is moving in an upward direction, you use light pressure.
REMEMBER THIS:
When you’re doing calligraphy, it’s light up, heavy down. Light pressure going upward, heavy pressure going downward.

Warming up
Next I want you to experiment a little. How thin can you make the lines with this pen? How thick can you make them? What about in between?
Get to know your pen by doing warmup exercises.

The better you’re able to control a brush pen, the better your calligraphy will be.
When using a brush pen, I suggest trying to control the pen with wrist movements instead of just with your fingers. This gives you better control.
Transitions
When you’re doing calligraphy, you will need to transition between thin and thick lines while you’re writing.
This is one of the trickiest things about calligraphy: doing those transitions smoothly.
It will take some practice. It does for everyone, so don’t get too frustrated if you don’t get it at first!
To transition from thin to thick, you will start light and then gradually increase pressure.
For example, when you’re doing an oval.

To transition from thick to thin, you’ll start with heavy pressure and gradually lighten pressure.
Like this:

Notice how I transitioned from heavy pressure coming downward to light pressure going up?


FREE calligraphy practice sheets
Grab these printable worksheets to learn how to use a brush pen, do warmup exercises, and practice the basic calligraphy strokes.
The basic calligraphy strokes
The basic strokes are the building blocks of lowercase letters.
With these eight strokes, you can write the entire lowercase alphabet (with the addition of several “odd” strokes).
Practicing the basic strokes before you start writing letters is key, because the better you get at writing these 8 strokes, the better you’ll be at calligraphy!
It all comes down to these strokes:
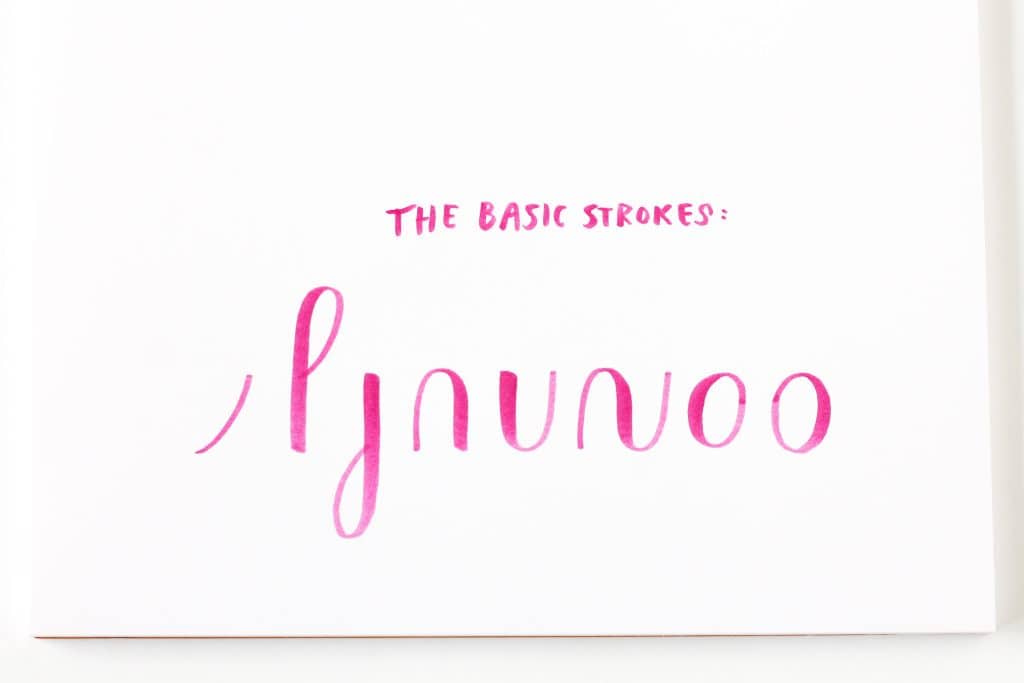
The basic strokes all have names, too. Don’t worry, you don’t have to memorize them.

First there’s the entry/exit stroke, then the overturn, underturn, compound curve, two ovals, an ascending loop, and a descending loop.
Let’s practice each one of these together.
Super-duper important tip:
Go slowly! If you go too fast you won’t be able to make very neat strokes… which is kinda the goal. So slow yourself way down and try to enjoy how calming it is to write these strokes 🙂
Entry/exit stroke
The entry/exit stroke is a thin line done with light pressure.
It starts at the baseline and comes up to the waistline and has a slight curve to it.

This one is pretty simple, so just try to keep the thin line consistent.
Overturn
The overturn stroke is a “hump” shape that starts with light pressure on one side and finishes with heavy pressure on the other side.

Start at the baseline and come up light. Then as you come to the waistline, you’ll turn and come down with heavy pressure.
The tricky part is keeping that transition at the top nice and smooth.
Underturn
The under turn stroke is just the reverse of the overturn.
It’s a U shape that starts with heavy pressure on one side and finishes with light pressure on the other.

Start at the waistline and come down with heavy pressure. As you come to the baseline, slowly release pressure as you turn to come back up light.
Once again, keeping that transition at the bottom smooth will take some practice.
(Want to go deeper? Get the full course.)
Compound curve
The compound curve is a combination of the two previous strokes.
So it’s like an overturn and underturn merged into one stroke.

Start at the baseline and come up with light pressure. As you come to the waistline, transition to heavy pressure as you turn and come back down.
Then you need to lighten pressure again as you come to the baseline and turn to go back up. You’ll finish the stroke at the waistline.
This stroke can be tricky because you have to make two pressure transitions in a pretty short time.
Oval
Ovals are some of the trickiest of the basic strokes!
For the first oval, you’ll move in a counter-clockwise direction.

Start at the right side of the oval with light pressure. As you come around the top of the oval, transition to heavy pressure.
Then as you come to the bottom the oval, you’ll need to release pressure and come back up light to finish the oval at the side.
Because of the oval shape, you really have to focus on those transitions to keep the oval smooth. It can feel kind of tight!
Reverse oval
The reverse oval goes in the opposite direction.

Start on the left side of the oval with light pressure. As you come around the top of the oval, transition to heavy pressure.
Then, as you come around to the bottom of the oval, transition to light pressure again and finish the oval shape where you started it.
Smooth ovals take a lot of practice, so these are some basic strokes that you’ll have to practice often!
Ascending loop
The ascending loop stroke is the tallest stroke.

Start at the waistline. With light pressure, come up in a loop shape to the ascender line. Then you’ll turn and come down with heavy pressure to the baseline.
You’ll want to just cover up the beginning of that loop with the downstroke.
Descending loop
The descending loop stroke starts at the waistline.

Come down with heavy pressure all the way to the descender line.
Then turn, transitioning to light pressure, and loop around to finish the stroke in the downstroke at the baseline.
And those are the 8 basic calligraphy strokes!
They’re not very difficult to do, but it takes practice to make them neat and consistent.

The more you practice these, the better!
Try spending 15 minutes a day just practicing these strokes. Fill an entire page (or more) with each one.
When you get really good at the basic strokes, writing letters will be a breeze!
Basic stroke worksheets
Not sure how to practice the basic strokes on your own? Grab my free practice guide with warmup exercises and the basic calligraphy strokes!
As you practice, go slowly and work on smooth pressure transitions and keeping the shapes consistent.
You’ll also be training your hand to make those subtle pressure adjustments the more you practice, which means it’ll feel easier over time!
(Need help with those pesky transition areas? Read this post: How to Get Rid of Messy Transitions in Calligraphy)
Building lowercase letters
Once you feel really comfortable doing the basic strokes, you can put them together to write lowercase letters.
For example, an oval + underturn makes the letter “a.”
An ascending loop + reverse oval + exit stroke makes the letter “b”.
You’ll write these strokes so they just overlap each other and… ta-da! You have a letter.

There are several stroke variations and odd strokes that are needed for some letters, but for the most part the lowercase alphabet is made up of those same 8 strokes that you’ve practiced.

Grab your calligraphy workbook
Make it easy for yourself and trace every letter of the alphabet in this printable workbook! Plus over 75 practice words to make it even more fun.
Something fun you can do is use a different colored pen for each stroke that you write. This reminds you to pick up your pen after each stroke!
(Here’s a colored set of the Tombow Fudenosuke pens on Amazon.)

(Ready to go deeper? Get the full online course with in-depth videos and personalized support!)
Connecting script letters
The next step is connecting the letters and writing complete words.
Notice how every letter ends with an exit stroke? That will be the connecting line to the next letter when you’re writing a word.
You’ll write the first letter, then write the next one so it just overlaps the exit stroke of the previous letter.

The exit strokes are essentially the “spacers” between letters, so pay attention to those.
When you keep exit strokes a consistent distance from the letters, the entire word will be evenly spaced, too.
Important tip for connecting letters
Typically, as we write letters, we finish them by bringing the exit stroke up to the waistline.
But when you’re writing a rounded letter next (like e, c, o, d), it’s harder to cover up the end of that exit stroke.
So, an easy way to fix this is to only bring exit strokes up about halfway to the waistline.
This makes it much easier for yourself to cover up those ends as you’re writing a word.

Writing neat words
To write neat, consistent words in calligraphy, there are several things to keep in mind.
- Spacing. Try to keep the spacing between letters generally consistent. Remember that the exit strokes are like spacers.
- Angle. The angle of each letter should ideally be the same. Pay attention to the previous letters and try to stick to the same angle. (This is a lot easier when you’re using worksheets with slant lines on them!)
- Sizing. The more you practice the basic strokes, the better you’ll be at making the strokes a consistent size. You just don’t want anything to be a lot bigger or smaller than the other letters.
- Pay attention to what letter comes next. Some letter connections are trickier than others and sometimes you need to think ahead when you’re writing a word.
- Don’t overlap too much. When writing the next letter, make sure to just cover up the end of the previous exit stroke and don’t overlap it too much, or the word will look messy.
Perfection isn’t the focus, but these are things to keep in mind as you practice your calligraphy.
Related read: 3 Important Things to Check For When Doing Calligraphy

Remember: if you go through the steps in this post and start writing words and they don’t look very good, it’s not because you’re bad at this!
Instead, you just need to spend more time practicing the building blocks (the basic strokes) and getting really good at those first.
(Related read: 17 Must-Know Practice Tips for Calligraphy Beginners)
The uppercase calligraphy alphabet
The uppercase calligraphy alphabet is different from the lowercase alphabet. It’s not necessarily made up of the same basic strokes of lowercase letters.
I suggest waiting to learn an uppercase alphabet until you feel really confident with lowercase letters.
When you are ready to learn uppercase letters, there are many different styles of them that you could learn!
Here’s an example of the uppercase alphabet that you learn inside my workbook and course:

Practicing modern calligraphy
So how do you practice calligraphy so that you actually improve?
Here are 6 tips for practicing calligraphy effectively.
1. Start by warming up your hand
No matter your experience – whether you’re a beginner or have been doing calligraphy for a long time – it’s always a good idea to warm up your hand before you start.
This can just look like simple doodles and exercises to get your hand loosened up.

2. Practice the basic strokes
If you don’t know what to practice, or you want to get better at calligraphy, or you feel rusty… practice the basic strokes!
Fill pages with them. Date the pages to see how you’re improving. Work on smoother transitions and more consistent shapes.
I said it earlier but I’ll say it again… the better you are at the basic strokes, the better you’ll be at calligraphy.

3. Practice with repetition
To really make progress, practice each stroke repeatedly. Yes, even fill entire pages with just one stroke.
Why is this important? Because repetition builds muscle memory in your hand.
This is why calligraphy looks so effortless when you see some people do it. Muscle memory makes it easier to do the strokes and pressure adjustments without even having to think about it!
Even if it feels hard now, keep up with your practice and it will start to feel much more easy and natural.

(Recommended read: 16 Fun Ways to Practice Calligraphy Without Getting Bored)
4. Practicing consistently
I’ll be honest with you: when I was learning calligraphy, I did not practice specific things for a certain amount of time each day.
It was much more random. Whenever I had time… whenever I felt like doing calligraphy… whatever I wanted to write.
(And no, I did not practice the basics as much as I should have!)
This is what some of my early calligraphy looked like, by the way:

Related read: What I Wish I Had Known as a Calligraphy Beginner
So, I’m not going to tell you to do what I never did as a beginner. Instead, you decide how much time you want to spend practicing your calligraphy.
There’s no right or wrong. We all have different priorities and there’s only so much time in a day!
BUT, if you want to get good at calligraphy faster, practicing consistently will help you reach your goals.
15 minutes a day of calligraphy practice is a great starting point. The more time, the better!
In the beginning, you’ll just be practicing the basic strokes. Then you’ll practice writing letters, and eventually writing entire words.
Clear your workspace, put on some music, and practice the strokes slowly.
I know practice can feel boring (especially repetitive practice), but it doesn’t have to be.
Turn it into some relaxing time for yourself while listening to your favorite music or podcast!
5. Only continue to the next step when you’re ready
There’s no need to rush through all of this.
In fact, you’ll be happier with your calligraphy if you take time to practice each step for a while before you move on to the next.
If you don’t yet feel confident doing one step, that’s okay and totally normal.
Just spend more time (days or weeks if necessary) on that concept, practicing repeatedly, figuring out what works and what doesn’t.
Only move on to the next thing when you feel ready.

Related: How to Use Calligraphy Worksheets to Boost Your Practice
Expanding your skills
Once you’ve mastered the fundamentals, you can start expanding your calligraphy skills.
There are so many things you could learn next. Here are some ideas:
- A different calligraphy style
- Faux calligraphy (doing calligraphy with a regular pen)
- Flourishing – try my Intro to Flourishing Workshop!
- Bounce calligraphy
- Color-blending with colored brush pens (here’s how)
- Doing larger-sized calligraphy with big brush pens
- Stylizing your calligraphy (I show you how in my online course)
Getting better at calligraphy is something that happens gradually and naturally as you continue to discover new things and add to your skills.

Wrapping it all up
As a quick recap, here’s what you need to do to learn modern brush calligraphy as a beginner:
- Get some supplies (brush pen, paper, worksheets)
- Learn how to use a brush pen
- Practice the basic strokes (a LOT)
- Put the basic strokes together to form lowercase letters
- Connect letters and write words
- Learn an uppercase alphabet (when you’re ready)
- Keep practicing with repetition!
Online calligraphy course
Want more guidance? I have an entire course on how to do beautiful calligraphy that goes in-depth on all of these steps!
In my course, I don’t just teach you the basics that everyone teaches.
You’ll go beyond the beginner stage as I show you how to develop your own beautiful style, how to start flourishing, and how to create your own stunning calligraphy designs.
I’ll also give you personalized feedback on your calligraphy so you have all the support you need.
In the course you’ll learn…
- Fixes for common calligraphy mistakes so you can reach your goals faster
- Important keys to writing neat, elegant words that are impressively consistent
- The secrets to stylizing your calligraphy so you can create your own unique style
- Foundational flourishing techniques so you can add elegant flourishes to your calligraphy that make it look even more impressive
- How to design balanced calligraphy layouts so you can write anything and feel confident in your skills!
This course equips you not just to do calligraphy, but to do it beautifully and confidently.
I’d love to see you inside the course!

However you decide to pursue your interest in calligraphy, remember this:
“Anything you’re willing to practice, you can do.”

If you’re willing to practice, there’s nothing stopping you from being awesome at calligraphy.
Did you enjoy this resource?
Share it with someone who’s interested in learning calligraphy!

Calligraphy FAQs
No, it’s really not! Learning anything new takes some effort, of course, and it does require patience and practice to get good at it, but anyone can learn calligraphy.
Absolutely! Messy handwriting does not mean you’ll be bad at calligraphy. The process of writing calligraphy is very different from everyday handwriting. Many people have messy handwriting and still do beautiful calligraphy.
Nope. Calligraphy might look like it’s just fancy cursive, but it’s not. The purpose and methods of calligraphy vs cursive are pretty different.
Yes! Read through this post again for the exact steps you need to take and start practicing the basic strokes. If you want to reach your goal faster, consider taking a class.
This varies from person to person, but you can learn basic calligraphy in a matter of weeks. In order to get really good at calligraphy, though, you need to continue practicing for months. How fast you learn depends on how dedicated you are to practice.
Modern calligraphy is a more freeform, stylized kind of calligraphy and doesn’t necessarily have specific rules to follow like traditional calligraphy scripts do (i.e. Copperplate or Spencerian).
Absolutely yes. It’s fun, rewarding, and looks amazing… and there are so many ways you can use your skills. It’s also a relaxing, calming, and inexpensive hobby.
